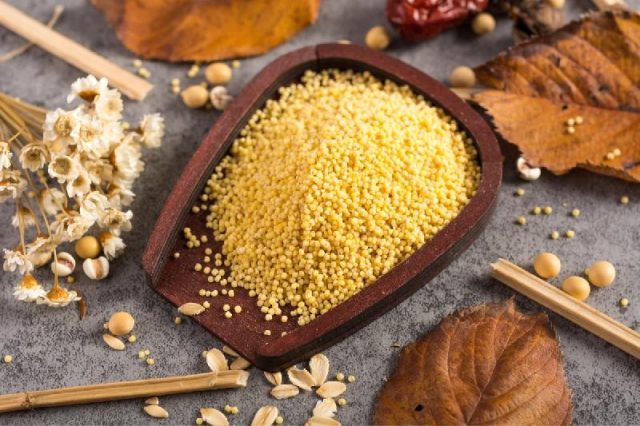
If you’re stocking up on healthy foods in your food storage pantry, millet should be included. More and more, popular food storage companies, such as Thrive Life, are offering foods that have become more popular as Americans have turned from overly processed foods to foods more nutritious and natural.
In addition to things like freeze-dried kale, organic amaranth, and gluten-free flour, millet is also available. I first came across it in real life several years ago when I was browsing Thrive Life’s website to make a purchase. I bought a can of millet and ended up liking it quite a lot. Millet is one of those things that we just don’t encounter very often in the modern Western world. Before this, my only exposure to millet was a line from an old TV show where someone proclaimed, “I will put a snake in her millet!”
What is Millet?
What is millet, where does it come from? What kind of recipes is it good for? It’s often an ingredient of birdseed, which automatically makes it quite a bit less interesting than its trendy cousin, quinoa, even though it is just as versatile. Like quinoa, for best results millet should be toasted before cooking. Millet has a mild, wholesome flavor that is a little bit like corn.
Millet originally comes from the Far East and India, where it was one of the first grains to be domesticated in those regions. It is high in minerals like copper, phosphorous, and manganese, as well as being a good source of protein and B vitamins. It can be cooked like other hot grain cereals, or made to be fluffy like rice. Today most couscous is made from semolina flour, but in days past it was made from millet.
Millet is a good addition to any food storage plan because it stores just as well as white rice (under ideal conditions, millet will stay fresh for 20 years when kept in an unopened #10 can), but is more nutritious (people who eat only white rice are at risk of developing a nutrient deficiency called beriberi).
Store millet in a tightly closed container and in a cool, dark, dry location. If you’re planning on storing millet long-term, it would be wise to put the containers of millet in the freezer for at least a week. This will kill off any microscopic insect eggs that might hatch later on. To be on the extra safe side, add an oxygen absorber to the millet once its time in the freezer ends. The oxygen absorber will deprive any remaining, live insect eggs of oxygen, thus killing them. Oxygen absorbers are inexpensive and easy to use. They will also remove oxygen in the container, which leads to a longer shelf life.
Another way to store millet is to use canning jars, a Food Saver vacuum sealer, and a jar sealer attachment. I explain the easy process in this video. This depletes the jar of oxygen and no additional oxygen absorber needs to be used.
How to use millet in recipes
Broccoli-Millet-Cheddar Casserole
Even though this is a Middle Eastern or Far Eastern food, what could make it more American than putting it into a casserole? This recipe is written for use with freeze-dried food-storage items but you can easily substitute fresh ingredients. After all, the whole point of food storage is not to supplant fresh ingredients but to have them available for use when fresh ingredients are not available.
You’ll notice that this recipe is 100% shelf stable and food storage friendly. None of the ingredients need to be refrigerated and can be stored long-term. For extra protein, you could always add chopped chicken, even the freeze-dried kind.
- 8 cups freeze-dried broccoli florets, reconstituted (You could also substitute FD kale or FD green beans)
- 1½ Tbsp vegetable oil
- 2 tsp salt
- ground black pepper to taste
- 1 ½ cups millet
- 3 cloves garlic (or 1 1/2 tsp granulated garlic)
- 1 Tbsp butter
- 1 c milk (fresh or reconstituted from powdered milk)
- 1 teaspoon dried thyme
- 1 1/3 c Freeze-Dried Cheddar cheese, reconstituted
Chinese Millet Porridge
For something a little more traditional, you could try millet as a breakfast cereal, as it is often eaten in China.
Ingredients
- 1/2 C millet
- 1 3/4 C water
Instructions
Toast the millet in the bottom of a small saucepan over medium-high heat for about five minutes, until it gives off a toasted aroma. Set aside as you bring the water to boil in a second saucepan. If you want a thicker porridge, you could use less water.
Add your toasted millet to boiling water and simmer over medium-low heat for 15–25 minutes, or until done. Grains will be translucent and will release starch into the water when it is fully cooked. Eat warm, adding sugar or honey to taste. Honey Crystals from Thrive Life are a nice, non-sticky option for a hot cereal like this one.
via thesurvivalmom


